Mastering advanced photography requires a deep understanding of your equipment. This resource offers a thorough exploration of a sophisticated device designed for professional and enthusiast photographers. Whether you’re capturing high-speed action or detailed landscapes, understanding the full range of features is key to unlocking your creative potential.
In the following sections, we will delve into the intricacies of this high-performance camera. You will learn how to optimize settings for various shooting scenarios, make the most of customizable options, and effectively navigate the system. This guide is crafted to enhance your photographic experience, helping you harness every tool at your disposal.
For those looking to refine their skills, this document serves as an essential reference. You’ll find step-by-step instructions, tips, and tricks that will guide you through each function. By the end, you’ll be equipped with the knowledge needed to elevate your photography to the next level.
Understanding the 7D II Controls

Mastering the controls of your camera is essential for capturing stunning photos in any situation. The numerous buttons, dials, and switches may seem overwhelming at first, but with a clear understanding of each, you can unlock the full potential of your device and elevate your photography skills.
In this section, we’ll explore the key controls and their functions, enabling you to quickly and efficiently adjust settings as you shoot.
- Main Dial: This is your primary tool for navigating menus and adjusting key settings such as aperture and shutter speed. Its position near the shutter button allows for quick changes without taking your eye off the viewfinder.
- Quick Control Dial: Located at the back of the camera, this dial provides easy access to various settings and menu options, especially during live view mode. It’s also used for scrolling through images during playback.
- Multi-Controller: The multi-controller is a joystick-like button that allows for precise selection of autofocus points and menu navigation. It’s particularly useful when you need to make quick adjustments to focus while shooting.
- AF-On Button: This button is dedicated to autofocus activation, allowing you to focus independently of the shutter release. It’s a vital tool for advanced focusing techniques like back-button focus.
- Mode Dial: The mode dial lets you switch between different shooting modes, from full automatic to complete manual control. Understanding each mode helps you choose the right one for your shooting environment.
- Top LCD Panel: The top LCD displays critical shooting information at a glance, including ISO, aperture, and shutter speed. Familiarity with this panel helps you quickly assess and adjust settings without needing to check the main screen.
By familiarizing yourself with these controls, you’ll be better equipped to capture the perfect shot every time, regardless of the shooting conditions or creative challenges you face.
Essential Setup Steps for Optimal Performance
To ensure that your advanced camera functions at its best, it is crucial to follow a set of foundational setup steps. These adjustments and preferences will maximize image quality, enhance usability, and ensure that your device operates smoothly in various shooting conditions.
- Initial Configuration: Begin by setting the language, date, and time. These basic settings are essential for organizing and cataloging your photos accurately.
- Image Quality Settings: Adjust the resolution and file format to match your needs. For high-quality prints, select the maximum resolution and choose RAW format for greater editing flexibility.
- Customizable Buttons: Assign frequently used functions to customizable buttons. This will streamline your shooting process, allowing you to quickly access important features.
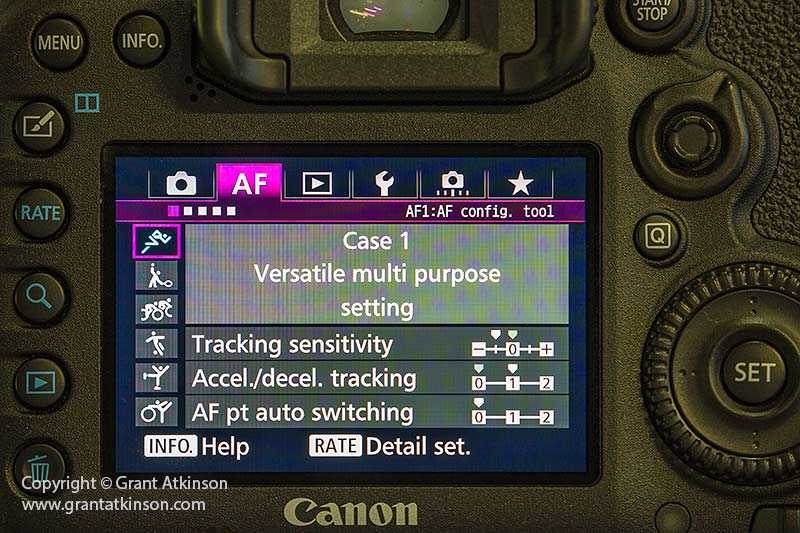
- Autofocus Optimization: Configure the autofocus system according to your shooting style. Whether capturing fast-moving subjects or focusing on still objects, setting up the autofocus points and modes properly will greatly impact your results.
- Exposure Settings: Fine-tune exposure parameters like ISO sensitivity, shutter speed, and aperture to suit different lighting conditions. Utilize exposure compensation to adjust the brightness without altering other settings.
- White Balance Adjustment: Set the white balance according to the lighting environment. This ensures that colors are rendered accurately, whether shooting under natural light, fluorescent lamps, or in mixed lighting situations.
- Battery Management: Activate power-saving features and monitor battery levels regularly. Proper power management will extend battery life during extended shoots.
- Memory Card Formatting: Format the memory card before using it for the first time and regularly thereafter. This prevents data corruption and ensures optimal performance when capturing high-resolution images and videos.
By following these essential setup steps, you’ll be prepared to capture high-quality images and videos with ease, allowing your camera to perform at its peak in any situation.
Mastering Autofocus Settings on the 7D Mark II
The autofocus system on the 7D Mark II is a powerful tool that allows photographers to capture sharp, precise images in various situations. By understanding how to customize and optimize these settings, users can significantly improve their photography skills, especially in dynamic environments.
Understanding the Different Focus Modes
The camera offers multiple focus modes tailored to different types of photography. Each mode is designed to excel in specific scenarios, whether you’re capturing fast-moving subjects or focusing on static scenes. Familiarize yourself with these modes to choose the one that best suits your needs.
| Focus Mode | Description | Best Use Case |
|---|---|---|
| Single Shot | Focuses once and locks when the shutter is pressed halfway. | Portraits, still objects |
| AI Servo | Continuously adjusts focus on moving subjects. | Sports, wildlife photography |
| AI Focus | Automatically switches between Single Shot and AI Servo based on subject movement. | General use, unpredictable movement |
Fine-Tuning Focus Area Selection

Focus area selection allows for greater control over which part of the image is in sharp focus. The camera provides several options, from focusing on a single point to tracking a subject across the frame. Understanding how to adjust these settings can help you keep the intended subject crisp, even in challenging conditions.
Customizing Camera Functions for Your Workflow
Tailoring your camera settings to fit your specific shooting style can greatly enhance efficiency and productivity. By adjusting various features and controls, you can create a more intuitive and responsive experience, allowing you to focus more on capturing the perfect shot and less on navigating through menus and settings.
Configuring Button Functions
One of the most effective ways to customize your camera is by assigning specific functions to different buttons. This allows you to access frequently used features quickly, without having to dive into the menu system. For example, you can reassign a button to control autofocus modes or exposure settings, enabling you to make quick adjustments on the fly. Experiment with different configurations to find what works best for your shooting style.
Setting Custom Shooting Modes
Custom shooting modes allow you to save your preferred settings for different types of photography, such as portrait, landscape, or action shots. By configuring these modes, you can switch between them with ease, ensuring that your camera is always optimized for the situation at hand. Consider setting up custom modes for various lighting conditions, focal lengths, or even creative effects, so you can adapt to changing environments quickly and efficiently.
By taking the time to customize your camera’s functions, you can streamline your workflow and enhance your overall shooting experience. Whether you’re capturing fast-paced action or carefully composed stills, having a camera that’s perfectly attuned to your needs can make all the difference.
Effective Techniques for Action Photography
Capturing dynamic moments requires a combination of skill, timing, and the right techniques. Action photography is all about freezing fast-moving subjects with clarity, conveying motion, and telling a compelling story through your shots. Below are several techniques that can help you excel in capturing high-speed events.
Mastering Shutter Speed
Shutter speed is crucial for action photography. The faster the shutter speed, the more likely you are to freeze motion without blur. Adjust your camera settings to use a high shutter speed, particularly for sports, wildlife, or any fast-paced environment.
- Start with a shutter speed of at least 1/1000th of a second.
- Experiment with different speeds to achieve the desired effect, balancing exposure as needed.
- Use burst mode to increase your chances of capturing the perfect moment.
Focusing Techniques
Maintaining sharp focus on a moving subject is essential. Autofocus modes designed for tracking movement are particularly useful, but manual focus can also be effective in certain situations.
- Select continuous autofocus mode to keep your subject in focus as it moves.
- Use predictive focus tracking to anticipate where the subject will be.
- Consider pre-focusing on a specific area where the action is expected to occur.
By understanding and applying these techniques, you can significantly improve your ability to capture stunning action shots that tell a story and convey the intensity of the moment.
Tips for Maintaining Your Canon 7D Mark II

Proper care and regular maintenance are crucial for ensuring the longevity and optimal performance of your DSLR camera. By following a few essential practices, you can protect your investment and keep your equipment functioning smoothly for years to come.
- Keep it Clean: Regularly clean the camera body and lens to prevent dust and debris from affecting image quality. Use a soft, dry cloth for the body and a lens brush or blower for the lens. Avoid using abrasive materials that can scratch surfaces.
- Store Properly: When not in use, store your camera in a cool, dry place. Use a padded camera bag or case to protect it from physical damage. Consider using silica gel packs to reduce moisture and prevent mold growth.
- Check for Firmware Updates: Periodically check for firmware updates from the manufacturer. These updates can improve performance, fix bugs, and add new features to your camera.
- Inspect and Maintain Batteries: Remove batteries from the camera if it will not be used for an extended period. Store them in a cool, dry place and avoid exposing them to extreme temperatures. Regularly check battery contacts for corrosion and clean them gently if needed.
- Handle with Care: Always handle your camera with clean hands and avoid touching the lens elements. Be mindful of where you place your camera to avoid accidental drops or impacts.
- Use Lens Caps: Always use lens caps when the camera is not in use to protect the lens from scratches and dust. This small precaution can significantly extend the life of your lens.
- Regularly Check Connections: Inspect the camera’s ports and connectors for any signs of wear or damage. Ensure that all connections are secure and free from dust or debris.