In today’s digital age, managing various devices with a single controller has become a common need in every household. This guide provides detailed steps and insights to streamline the process of unifying multiple entertainment systems into one seamless operation. Whether you are an experienced user or a beginner, this resource will equip you with the knowledge to enhance your media experience.
As technology evolves, so does the complexity of managing different devices. This guide offers a straightforward approach, focusing on simplifying the connection and configuration process. With easy-to-follow instructions, you will be able to quickly synchronize your devices, ensuring that your home entertainment setup works harmoniously.
Overview of the Logitech Harmony 650
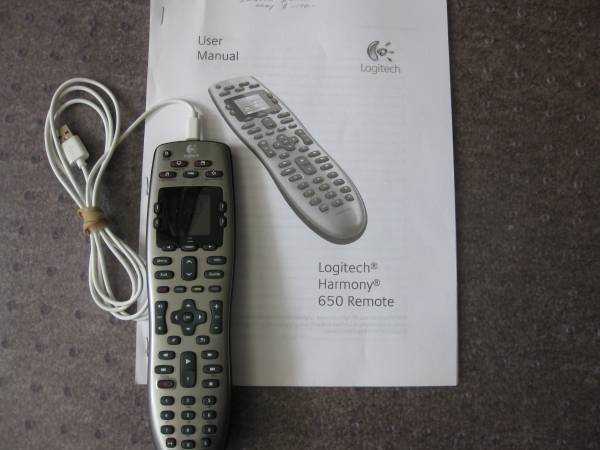
This section provides an introduction to a versatile device designed for managing multiple entertainment systems through a single interface. It simplifies the control of various home entertainment devices, offering an integrated solution for easy access to all your media equipment.
- One-touch activity buttons allow users to effortlessly switch between different tasks such as watching TV or listening to music.
- The device is compatible with a wide range of electronics, enabling users to consolidate several remote controls into one.
- Its intuitive display offers a straightforward way to select activities and control functions.
- Users can customize the settings to suit their preferences, creating a personalized entertainment experience.
- Comprehensive compatibility ensures that this tool works seamlessly with both new and older equipment.
Setting Up the Harmony 650 Remote
To begin using your universal remote control, it’s essential to first establish its connection to your devices. This process ensures that the remote can effectively manage all your entertainment systems with ease. By following a few straightforward steps, you can quickly set up your remote to work seamlessly with various electronic devices.
Initial Configuration
Start by gathering the remote and ensuring it has fresh batteries installed. Next, connect the remote to your computer using the provided USB cable. Once connected, use the software to identify and configure the devices you want the remote to control. This step is crucial as it allows the remote to learn the commands for each of your devices.
Syncing Devices
After identifying the devices, follow the on-screen instructions to sync them with the remote. This process typically involves selecting the make and model of each device, followed by testing the remote’s functionality with them. Ensure that each device responds correctly to the commands from the remote before completing the setup. If any issues arise, recheck the connections and repeat the syncing process.
Programming and Configuring Devices
Setting up and managing your devices can be streamlined through a centralized remote system, offering a unified control experience. This section guides you through the essential steps for integrating various gadgets into your control ecosystem, ensuring seamless operation across your home entertainment and automation setup.
Adding New Devices
To incorporate a new gadget, you must initiate the setup process by accessing the dedicated interface for device management. Once there, follow the prompts to identify the type and model of your device. The system will then sync and assign appropriate commands, enabling effortless control.
Customizing Settings
After successfully integrating a device, you can personalize its controls to suit your preferences. Navigate to the configuration section, where you can modify button functions, adjust timings, and create custom macros for complex tasks. These adjustments ensure that your control experience is tailored to your unique needs, enhancing overall efficiency.
Understanding the Harmony Interface
The control interface is designed for intuitive management of various connected devices. This section provides a comprehensive overview of how to navigate and customize the interface for an enhanced user experience.
| Feature | Description |
|---|---|
| Home Screen | The starting point for accessing all your devices and activities. It displays the most frequently used commands and quick access to custom settings. |
| Navigation Buttons | Used for moving through menus and selecting options. These buttons ensure quick and easy access to different sections of the interface. |
| Customizable Activities | Allows you to group multiple device commands into a single action. This feature is perfect for automating common tasks, like watching TV or playing a movie. |
| Settings Menu | Offers options to personalize the control experience, such as adjusting the display brightness, configuring device settings, and updating software. |
Customizing Buttons and Activities
In this section, we’ll explore how to tailor the control interface to suit your preferences and daily usage patterns. By adjusting the functionality of buttons and configuring activities, you can create a more intuitive and efficient setup that aligns with your specific needs.
Modifying Button Functions
To enhance the ease of use, you can reassign the functions of various buttons. This customization allows you to streamline common tasks, making frequently used commands more accessible. Whether you prefer to swap default actions or add new ones, the process is straightforward and flexible.
Personalizing Activities
Activities group multiple commands into a single action, simplifying complex routines. You can customize these to match your typical usage scenarios, ensuring that everything operates smoothly with a single press. By setting up personalized activities, you enhance both convenience and efficiency.
Troubleshooting Common Issues
When dealing with modern remote devices, occasional hiccups can arise that disrupt the seamless control of your entertainment systems. This section will help you identify and resolve some of the most frequent challenges users may encounter.
Device Connectivity Problems

Sometimes, your remote may struggle to communicate with certain devices. This can be due to interference, range limitations, or incorrect settings. Ensure all devices are within range and free of obstacles. Double-check that the correct profiles are selected and the signal paths are unobstructed.
Button Response Delay
A delay in response when pressing buttons can be frustrating. This may result from low power, outdated firmware, or an overloaded system. Replace batteries if needed, and ensure your device firmware is up to date. Reducing the number of connected devices can also improve performance.
| Issue | Possible Cause | Solution |
|---|---|---|
| No Response | Battery depletion or signal obstruction | Replace batteries, remove obstacles |
| Incorrect Device Control |