For those seeking to maintain a neat appearance from the comfort of home, mastering the usage of your grooming tool is essential. Whether you are aiming for a clean shave, precise trimming, or experimenting with different lengths, understanding how to operate and care for your device is key to achieving professional results.
In this guide, we will explore the features and functionality of your grooming kit, highlighting the steps necessary to ensure smooth operation. We’ll cover how to prepare your device, adjust settings, and properly clean and maintain it, so you can achieve consistent results every time.
From basic setup to advanced techniques, this resource offers detailed insights, helping both beginners and experienced users get the most out of their trimming experience. Follow along to discover practical tips and tricks for maintaining your personal grooming tool in optimal condition.
Understanding the Wahl Color Pro Features
Exploring the capabilities of your grooming tool allows for better results and ease of use. By familiarizing yourself with its key elements, you can achieve precise, consistent cuts tailored to your preferences. In this section, we break down the various functions and attachments to help you get the most out of your device.
Guide Combs and Blade Adjustments

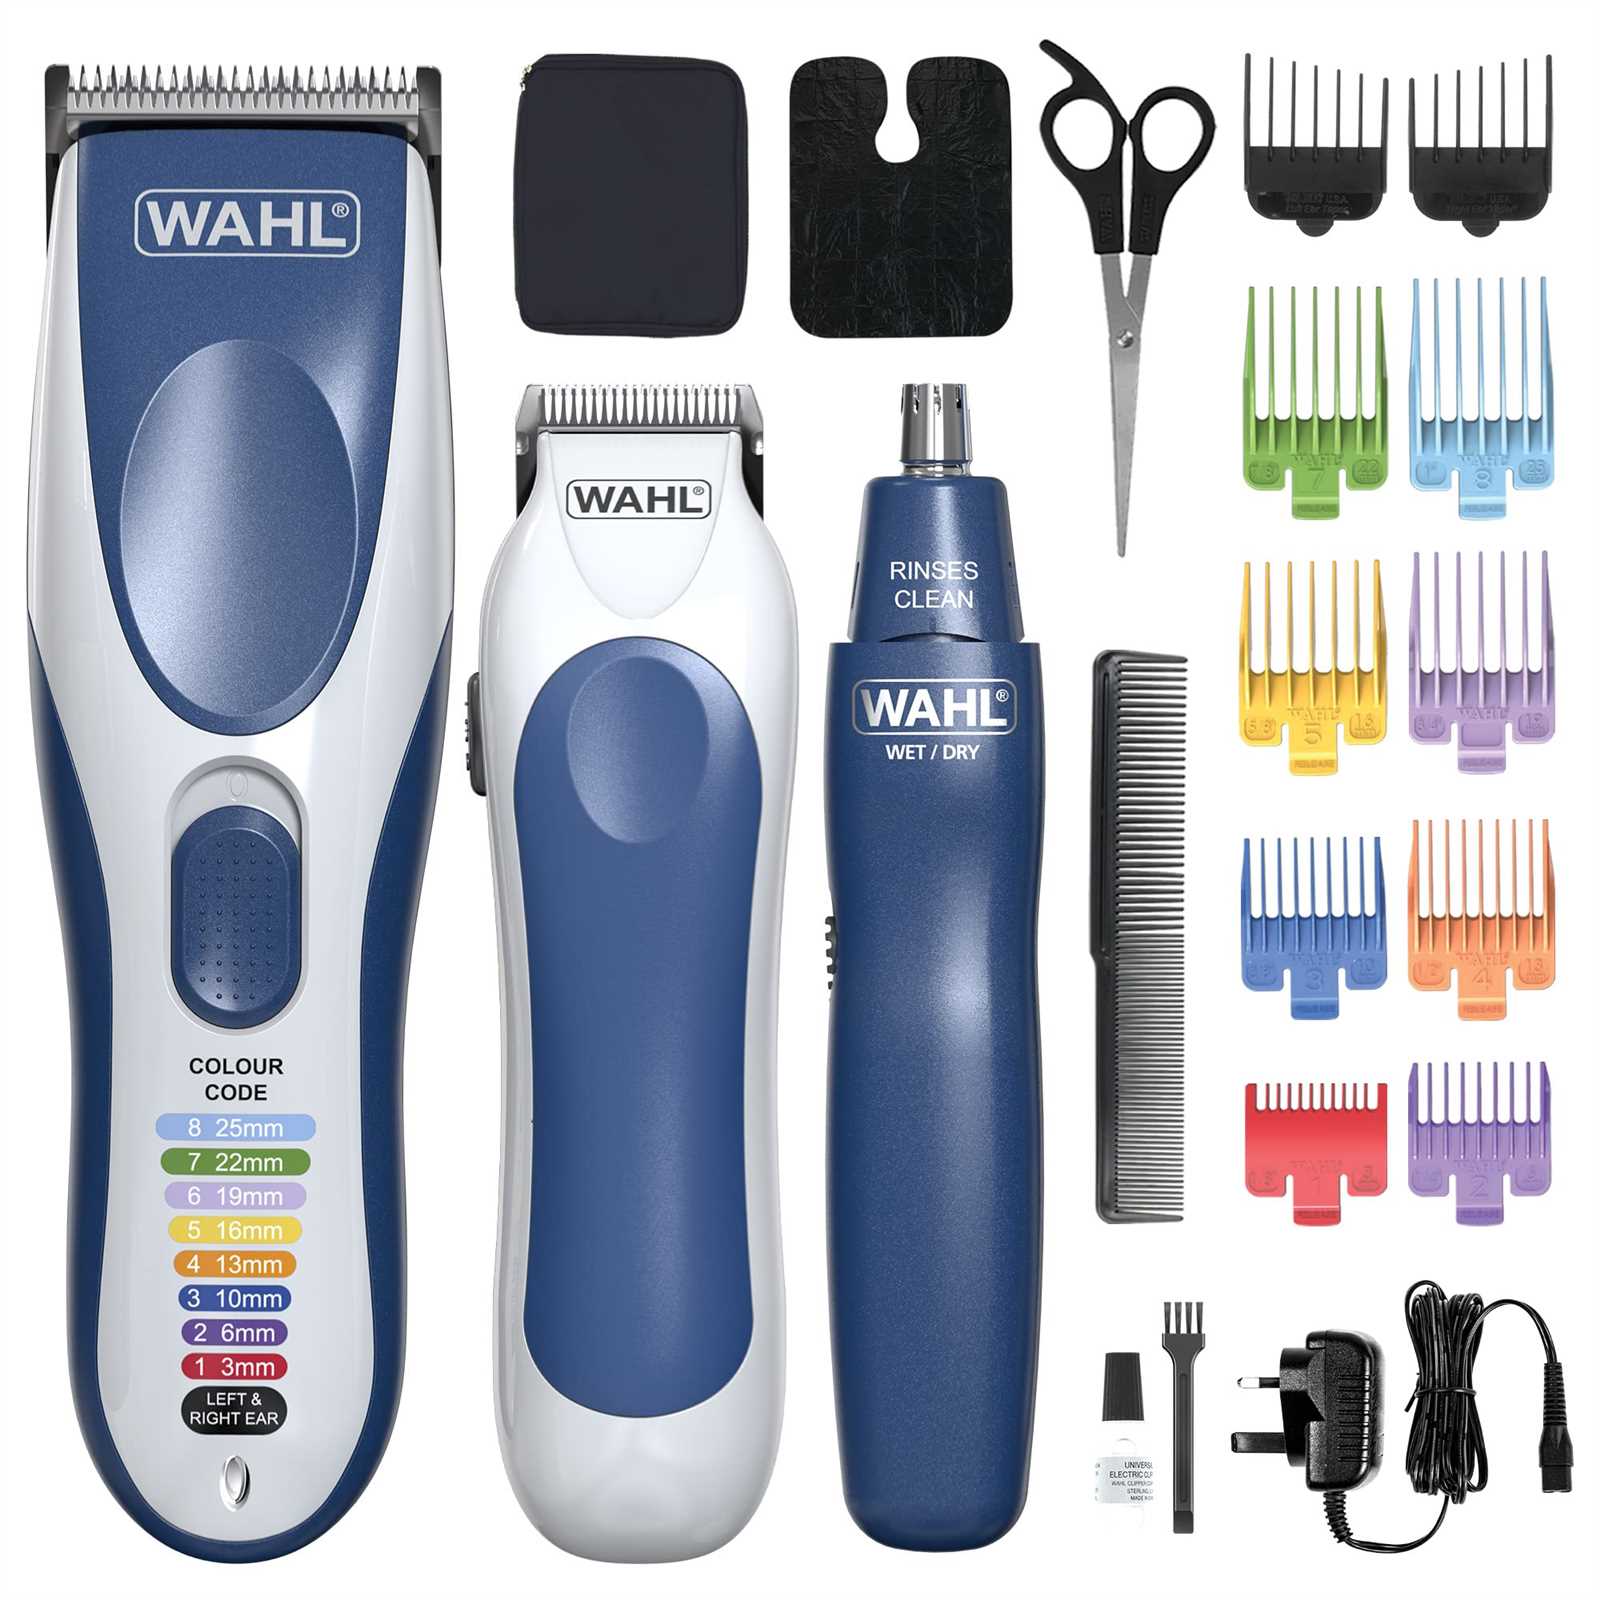
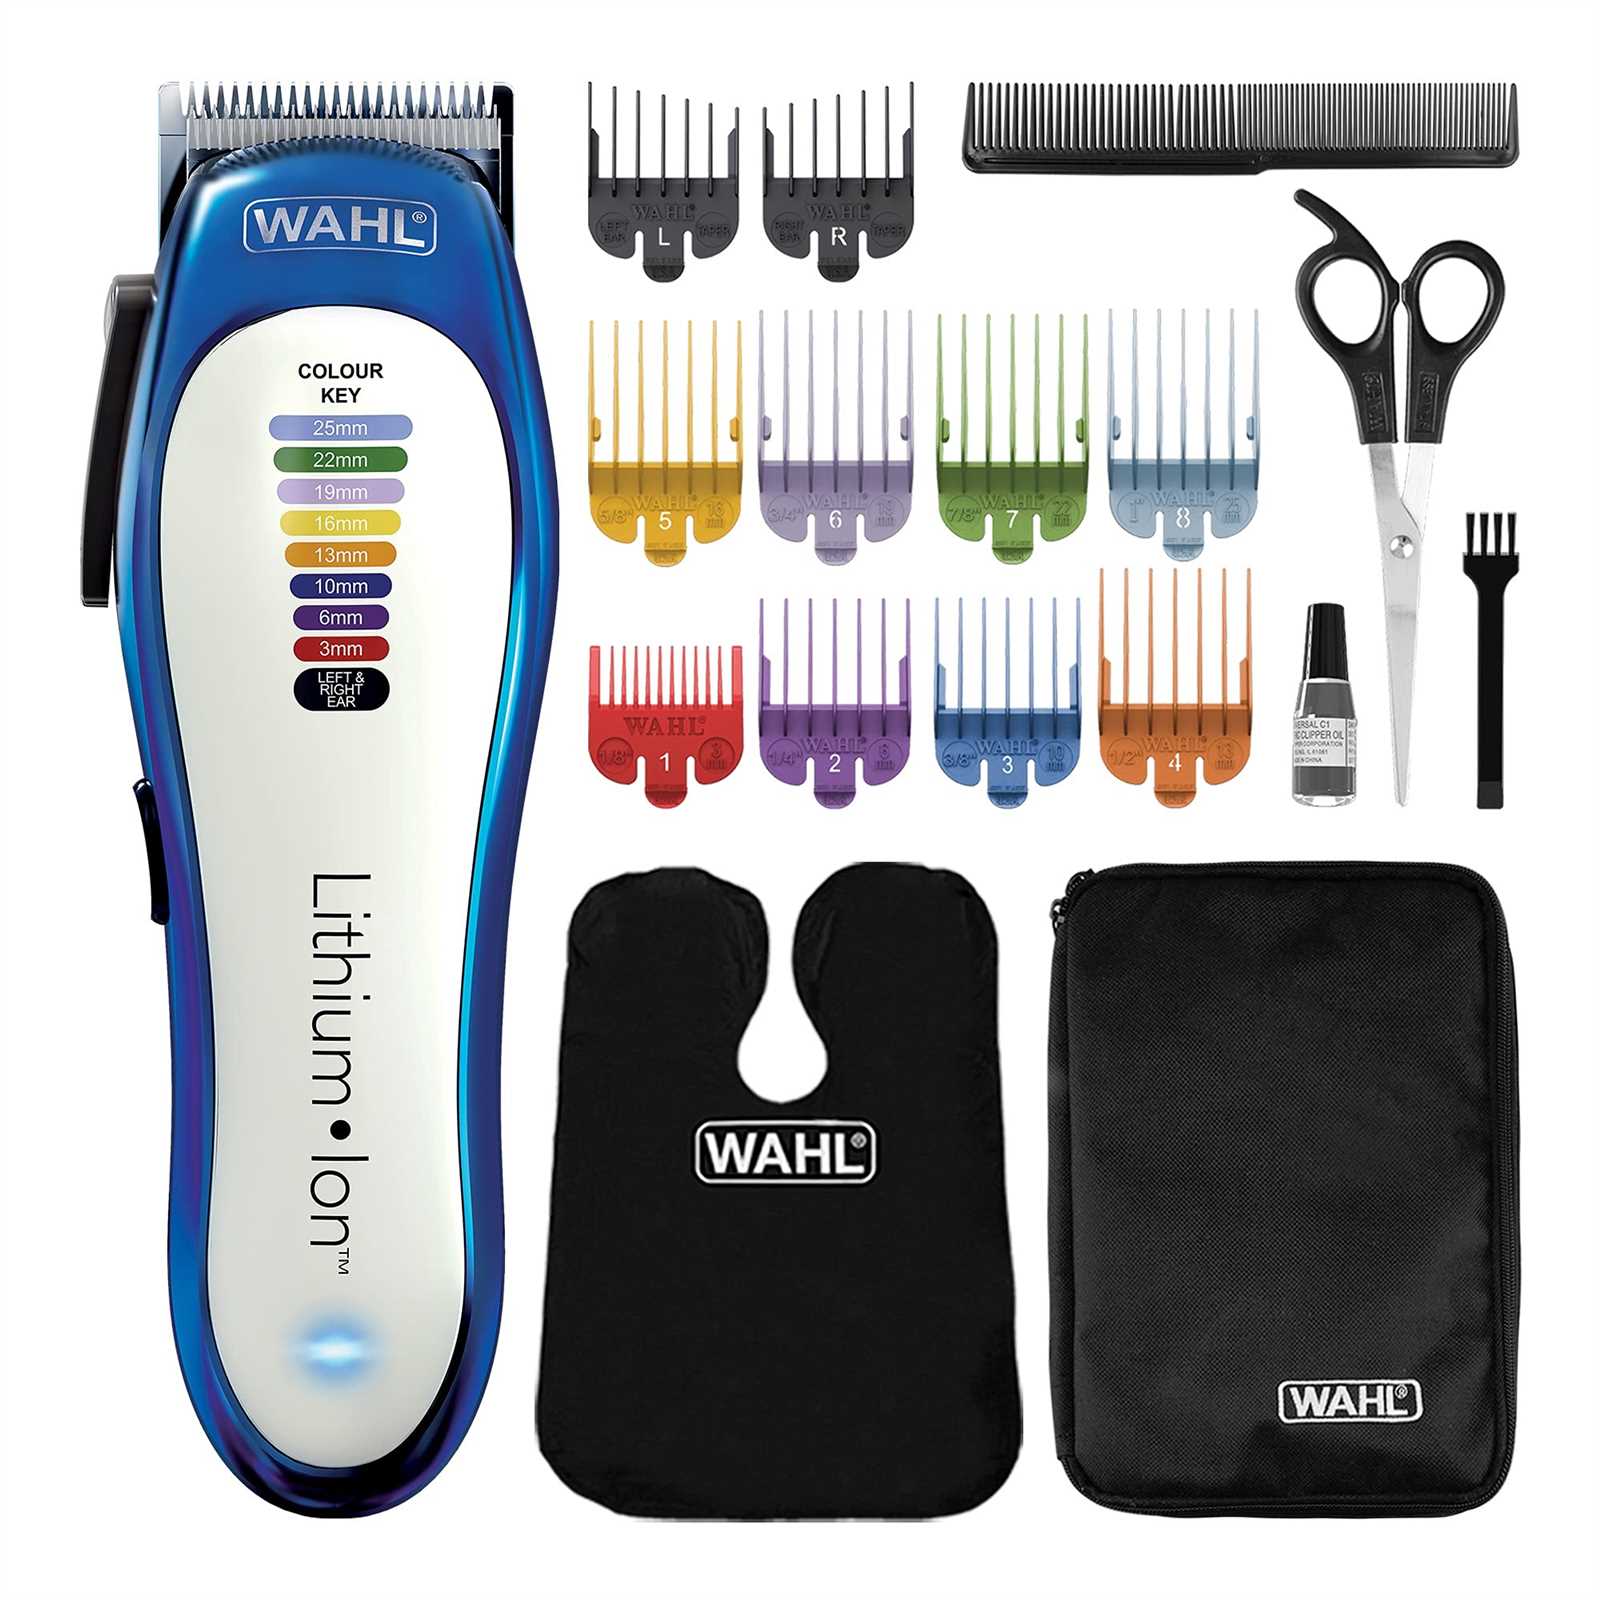
The device includes a variety of comb attachments, each designed for different hair lengths. These combs are color-coded for quick identification, enabling seamless switching during use. Additionally, adjustable blades offer control over the cutting depth, providing versatility whether you need a close trim or a more layered cut.
Ergonomic Design and Maintenance

Comfort is ensured with an ergonomic handle that allows for extended use without strain. Regular maintenance, such as cleaning and oiling the blades, not only extends the lifespan of the tool but also ensures consistent performance. Removable parts facilitate easy cleaning, helping maintain hygiene and sharpness over time.
How to Set Up Your Clipper Correctly

Proper setup of your clipper ensures smooth operation, longevity, and the best possible results. Following these steps will help you get started with your grooming device effectively and avoid potential issues.
- Unpack and Inspect: Carefully remove all components from the packaging. Verify that all parts are present and check for any visible defects.
- Initial Cleaning: Before first use, clean the blades using the provided brush to remove any debris. Even new devices can have minor dust particles from manufacturing.
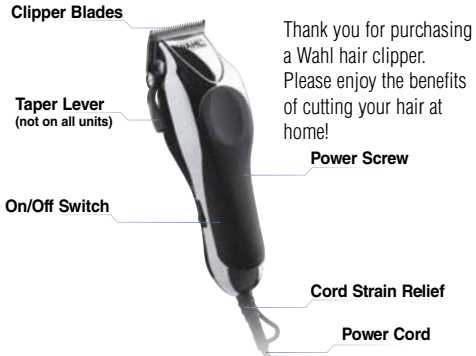
- Blade Alignment: Ensure the blades are aligned correctly. Misaligned blades can lead to uneven cutting or even skin irritation.
- Lubricate the Blades: Apply a few drops of oil to the blade edges. Lubrication reduces friction and extends the life of your clipper.
- Power Source: If the clipper is cordless, fully charge the battery before first use. For corded models, ensure the power cord is untangled and securely connected.
- Test Run: Turn on the clipper to check for smooth operation. Listen for consistent sound; unusual noise may indicate incorrect assembly or other issues.
Following these setup steps guarantees your clipper performs at its best, providing clean, efficient cuts every time.
Step-by-Step Guide for Haircutting at Home
Cutting hair at home can be a practical and rewarding experience. With the right preparation, tools, and techniques, you can achieve salon-quality results while saving both time and money. This guide provides a structured approach to help you confidently handle different styles and lengths, ensuring a neat and polished look.
Preparing for the Haircut
Before you start, ensure that the hair is clean and completely dry. Gather all necessary tools, including clippers, scissors, a comb, and a cape or towel to protect clothing. Select the appropriate guide comb based on the desired hair length. For best results, cut in a well-lit area with access to a mirror.
Basic Haircutting Techniques
Understanding the fundamentals is crucial for a smooth haircut. Start by trimming the sides and back before moving to the top. Hold the clipper firmly and work against the direction of hair growth, using slow and steady strokes. For blending, switch to a smaller guide comb to create a seamless transition between different lengths.
| Step | Description |
|---|---|
| 1. Section the Hair | Divide the hair into manageable sections. Use clips to keep sections separate and begin cutting from the lower parts. |
| 2. Trim the Sides and Back | Start with the sides and back, using short upward strokes. Keep the blade flat against the head to ensure an even cut. |
| 3. Cut the Top | Move on to the top, trimming with a longer guide comb. Use scissors for more precise detailing if needed. |
| 4. Blend and Finish | Switch to a smaller guide comb for blending. Clean up the neckline and around the ears for a polished finish. |
With patience and practice, you can master these techniques, allowing for consistent results and versatile styles. Remember to start with simple cuts before progressing to more complex designs.
Maintenance Tips for Long-Lasting Performance
To ensure your grooming tool delivers consistent results over time, proper care and regular upkeep are essential. Adopting a simple maintenance routine can significantly extend the lifespan of your device while maintaining optimal performance.
Start by cleaning the blades after each use. This prevents hair buildup, which can dull the blades and reduce efficiency. Use a small brush or the included cleaning tool to remove any debris from between the teeth of the blade. Rinsing under water, if your model allows it, is also beneficial for thorough cleaning.
Regular lubrication is crucial. Applying a few drops of blade oil keeps the mechanism running smoothly and prevents unnecessary wear. Ensure the blades are well-oiled before and after each use, wiping off excess oil with a cloth.
Proper storage is another key factor. Store your grooming device in a cool, dry place, preferably in a protective case. This helps avoid damage from dust, moisture, or accidental drops.
Lastly, schedule periodic deep cleanings and blade alignments. This can involve more detailed disassembly or professional servicing to maintain peak functionality.
Interpreting the Color-Coded Combs
Understanding the comb attachments is crucial for achieving the desired haircut length. Each guide is marked with a specific hue, designed to simplify the selection process by visually identifying different sizes. Proper usage ensures consistent results and an easy grooming experience.
The color system helps users quickly identify the corresponding length, eliminating guesswork. Whether you’re aiming for a close trim or a longer cut, these guides make the process more intuitive.
Tip: Always check the markings on the comb for the precise measurement in millimeters or inches. This allows for accurate adjustments and more consistent styling outcomes.
Troubleshooting Common Issues with Wahl Clippers
When working with grooming tools, encountering problems can be frustrating. This section provides guidance on addressing typical malfunctions and ensures your equipment remains in top condition. By identifying and solving common issues, you can maintain optimal performance and extend the lifespan of your grooming tools.
- Clippers Not Turning On
- Check if the device is properly plugged in or if the battery is charged.
- Ensure the power switch is fully engaged.
- Inspect for any damaged cords or connections.
- Uneven Cutting
- Confirm that the blades are properly aligned and securely attached.
- Regularly clean and oil the blades to prevent buildup.
- Check if the guide comb is correctly positioned and not damaged.
- Excessive Noise
- Examine the blades for any obstructions or wear that may cause unusual sounds.
- Lubricate the blades and moving parts to reduce friction.
- Ensure all parts are tightly secured and properly assembled.
- Overheating
- Allow the clippers to cool down between uses to prevent overheating.
- Clean the blades and motor regularly to avoid overheating caused by debris.
- Check for any mechanical issues that might contribute to excessive heat.
By following these troubleshooting tips, you can effectively address and resolve common issues that may arise with your grooming tools. Regular maintenance and proper handling will help ensure reliable performance and longevity of your equipment.